Hey Lykkers! Ready to learn more about the magic behind your favorite lipstick? If you're curious about what goes into making that perfect swipe of color on your lips or want to know how you can create your own at home, you're in the right place!
Let’s break down the process and ingredients behind lipstick, in a fun and easy way.
What’s in Your Lipstick?
Let’s start with the basics. Lipstick might look like just a pretty color in a tube, but there's a lot going on behind the scenes to make it just right for your lips. Here’s what’s inside:
- Waxes: Waxes give lipstick its shape and firmness. Common types you’ll find are beeswax and carnauba wax. These help the lipstick stay in place and glide smoothly on your lips.
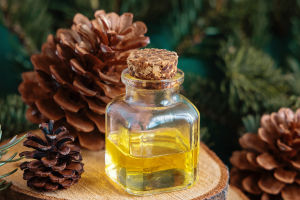
- Oils and Butters: These ingredients, like castor oil, coconut oil, and shea butter, make your lipstick feel soft and moisturizing. Without these, your lips would feel dry, and who wants that?
- Colorants: The pigments that make your lipstick the perfect shade! They can be natural like beetroot powder or synthetic, and they’re what give your lips that gorgeous pop of color.
- Moisturizers: Nobody likes dry lips, so Vitamin E and other moisturizing ingredients are added to keep things smooth and hydrated.
- Extras: Depending on the brand, your lipstick may also have added fragrance, sun protection, or preservatives to keep it fresh.
How Lipstick is Made?: The Behind-the-Scenes Process
Ever wonder how your lipstick goes from ingredients to the beautiful tube that you love? Here's a quick rundown of how it’s made!
1. Mixing Pigments and Oils: First, the right color pigment is mixed with oils, usually in a 2:1 ratio of oils to pigment.
2. Adding Wax: Next, they add waxes to the mix. This is what gives lipstick its shape and makes sure it’s smooth and creamy when you apply it.
3. Heating and Cooling: The mixture is carefully heated to a certain temperature to make sure everything blends perfectly. Then, it's allowed to cool, and that’s when it’s poured into molds.
4. Shaping and Polishing: Once the lipstick cools and sets, it's carefully polished to get that smooth, glossy finish we all love.
5. Packaging: The final step is putting the lipstick into its tube, and voilà – it’s ready to be packed and sent to you!
DIY Lipstick: Make Your Own at Home
Now, if you're feeling adventurous, why not try making your own lipstick? It’s surprisingly easy and fun to do. Plus, you get to choose exactly what goes into it! Here's a simple recipe you can try:
What You’ll Need?:
- 1 teaspoon beeswax (for structure)
- 1 teaspoon cocoa butter or shea butter (for softness)
- 1 teaspoon coconut oil (for moisture)
- Natural colorants like beetroot powder (for red) or turmeric (for orange)
- A few drops of essential oil (like lavender or peppermint) for a little scent
Steps:
1. Melt the Ingredients: In a double boiler, melt together the cocoa butter, coconut oil, and beeswax. Stir occasionally until it’s completely smooth.
2. Add Color: Stir in your colorants. If you want a red shade, add a bit of beetroot powder; for orange, go for turmeric.
3. Set and Enjoy: Pour the mixture into a small container and let it cool for a few hours. Once it’s solid, it’s ready to use!
Why You Should Care About What’s in Your Lipstick?
Lipstick is something we wear every day, so it’s important to know what’s going onto your lips. Many commercial lipsticks contain synthetic chemicals and preservatives, but making your own or choosing natural options can ensure you're using something gentler on your skin.
Also, when you make your own lipstick, you can customize the color and scent, and avoid any ingredients you might be allergic to. Plus, it's a fun project that gives you control over what you put on your skin!
Wrapping Up
Now that you know what goes into making lipstick, from the ingredients to the process, you can appreciate it even more. Whether you buy it or make it yourself, lipstick is a little piece of beauty that’s as fun to learn about as it is to wear. So go ahead, experiment with some natural DIY options, or just treat yourself to a new shade – you deserve it!